 I celebrate Dia de los Muertos with my family every year, but in all honesty, this is the first year I’ve taken a stab at making the iconic Pan De Muerto, or rather, Bread Of The Dead.
If you aren’t familiar, Dia de los Muertos occurs the day after Halloween. It is a celebration of life in the memory of those who have passed, and the festivities are amazing.
 Although most noted for the colorfulness and sugar skulls, food is actually the biggest part of celebrating.
So what makes Pan de Muerto, or Bread of the Dead, so special?
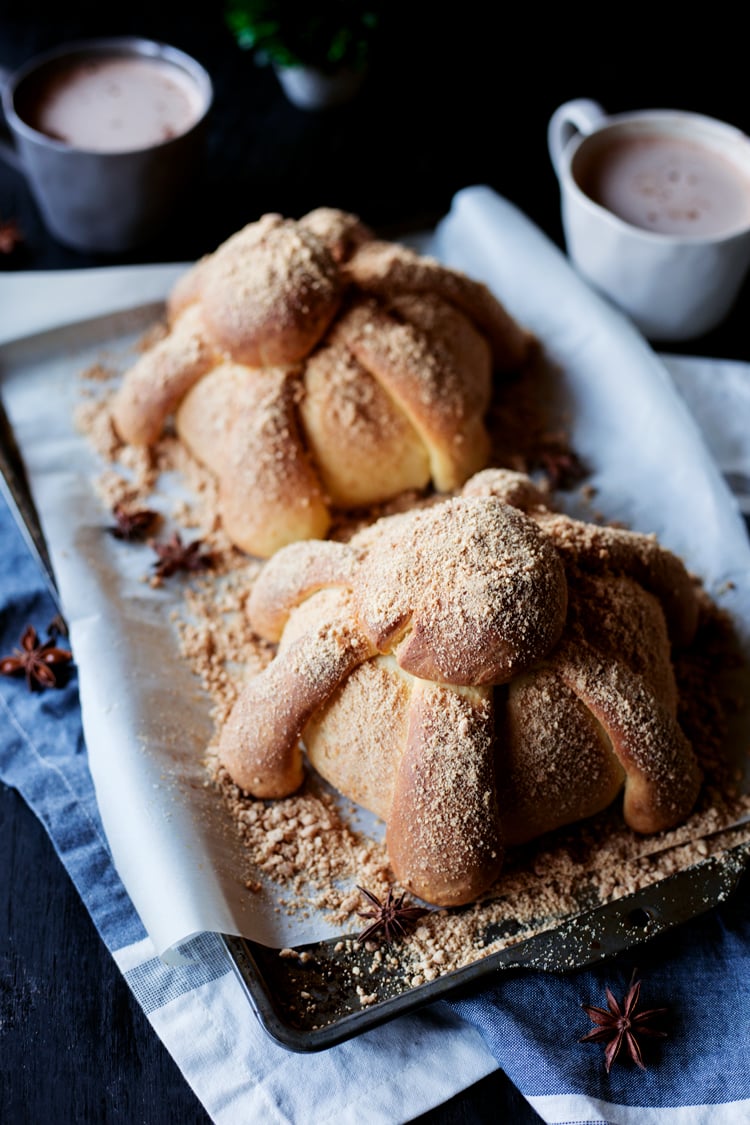
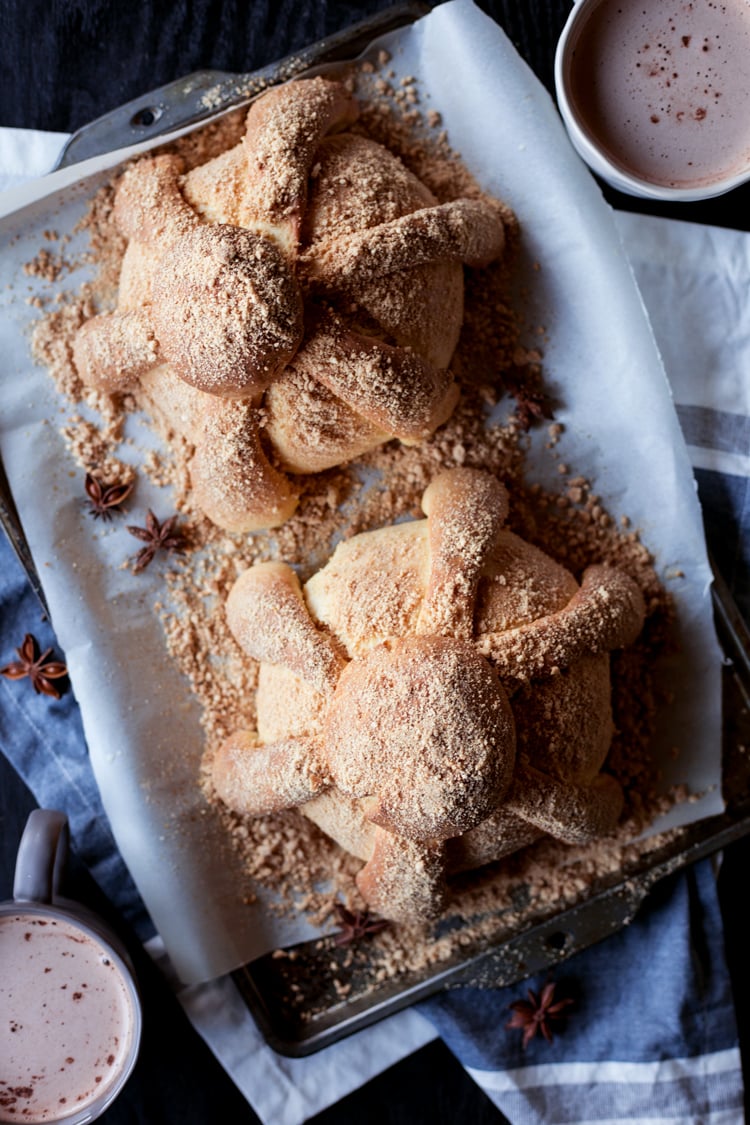
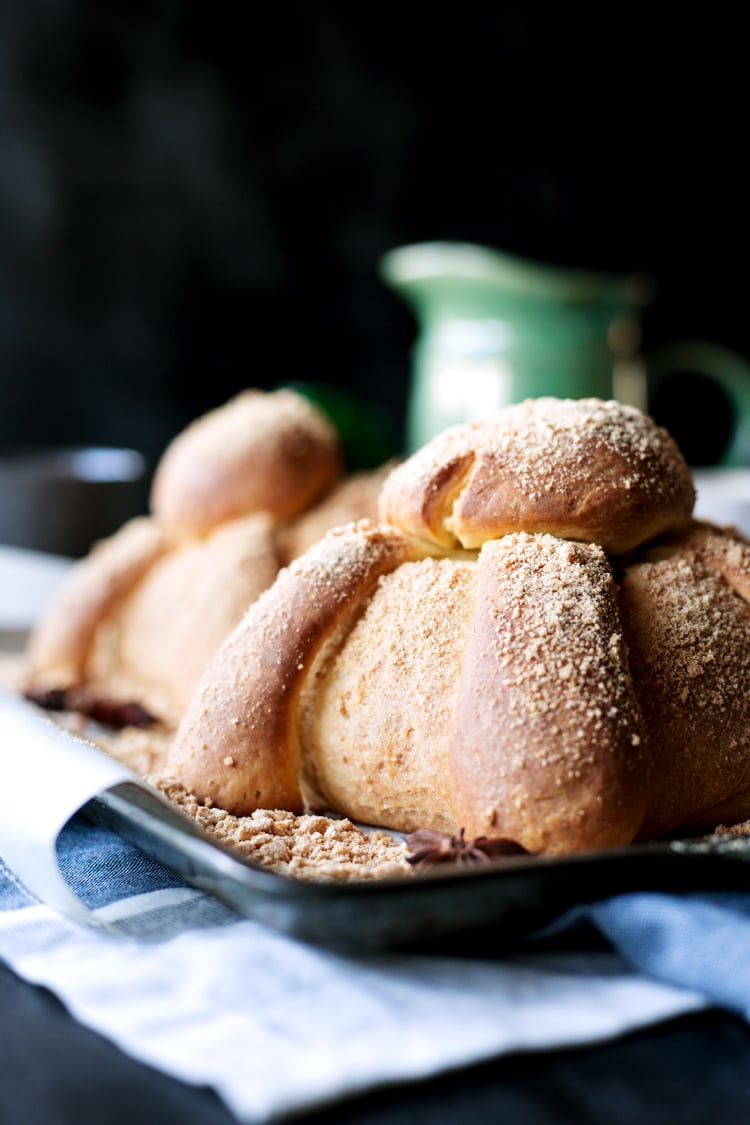
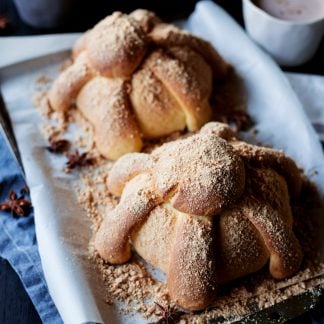
It’s a slightly sweet treat made in the weeks leading up to Dia de los Muertos, and it features a domed loaf with a round protrusion as well as long ones.
In actuality, they symbolize a skull and bones, coming out of the funeral mound to greet the living!
Cool, huh?
 The predominant flavors are orange and anise, which lends a subtle sweet and spiciness to the loaf. It’s a dense bread with a crusty exterior, and is meant to be served with a cup of Mexican hot chocolate.
I’m getting you hungry already huh?
I created this Pan de Muerto (Bread of the Dead) with a little twist for you! Instead of using orange blossom water and crushed anise seeds, I used orange and anise extracts. But in addition to that, I substituted a bit of the flour for some crushed Cinnamon Toast Crunch.
I even used Cinnamon Toast Crunch as the finisher instead of plain sugar!
 I really like the light cinnamon flavor it added to the bread. So yum.
Since we’re all about Cereal con Cariño in this house, it makes sense to include it in fun and inventive ways, especially leading up to the biggest celebration of life. Live life to the fullest!
 Also! If you happen to be in the Los Angeles area, General Mill is throwing a Dia de Los Muertos event! On 10/29 from 12-8pm enjoy a celebration for the whole family, so check out the deets and visit Cereal con Cariño.
Ingredients
- 1¼ oz Packet Active Dry Yeast
- 4 ⅓ C All-Purpose Flour divided
- ¼ C Warm Water
- 1½ C Crushed Cinnamon Toast Crunch divided
- 6 Large Eggs
- 1¼ tsp Kosher Salt
- 3 Tbsp Orange Extract
- 2 Tbsp Anise Extract
- ¾ C Sugar
- ¾ C Unsalted Butter softened
- 6 Tbsp Melted Butter divided
Instructions
- Mix yeast, ⅓ cup flour, and ¼ cup warm water in the bowl of a stand mixer with a spatula until a sticky dough forms. Let rest, uncovered, in a warm, draft-free area until starter looks very loose and bubbles are forming on top, about 35 minutes.
- Whisk eggs, salt, orange and anise extract, and ¾ cup sugar in a medium bowl until foamy and sugar begins to dissolve, about 1 minute. Add egg mixture and remaining 4 cups flour and 1 cup Cinnamon Toast Crunch to starter and mix with a dough hook on medium-low speed, adding the ¾ cup softened butter a few pieces at a time, until a soft dough forms, about 5 minutes. Increase speed to medium and continue mixing until dough is shiny and elastic, about 10 minutes.
- Lightly brush a large bowl with 2 tablespoons melted butter. Transfer dough to bowl, then cover with plastic wrap and let rise in a warm, draft-free area until almost doubled in size, around 2 hours.
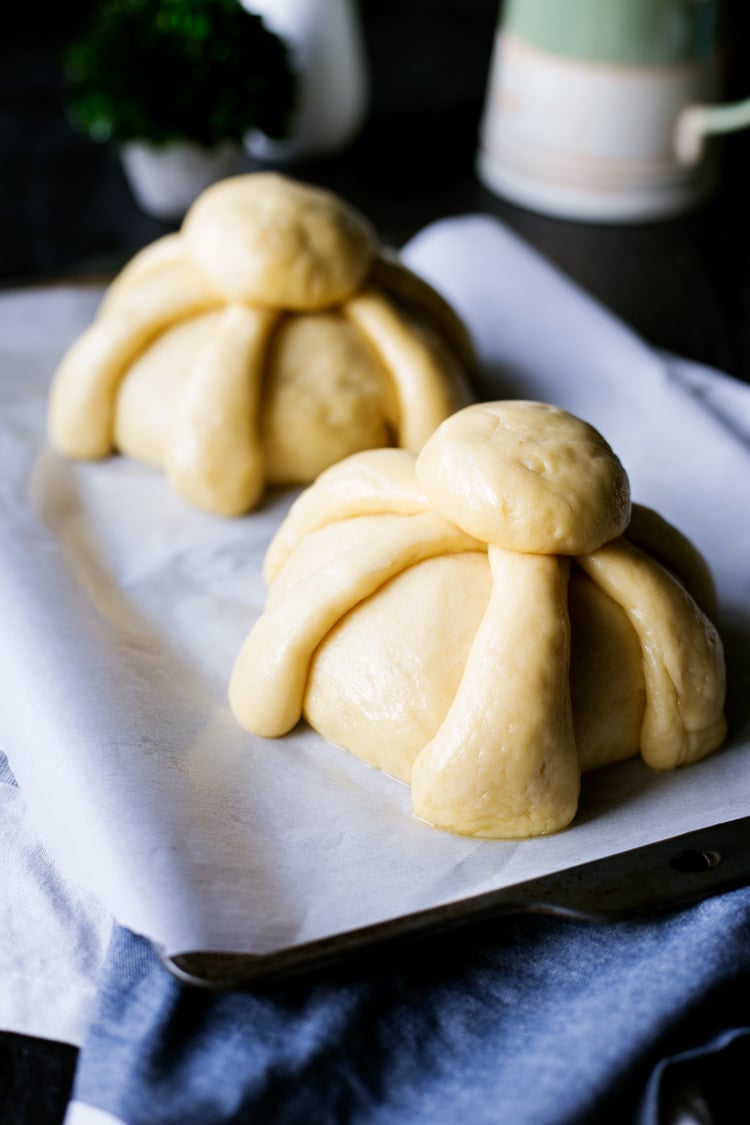
- Line 2 large baking sheets with parchment paper; then coat with nonstick spray. Turn out dough onto a clean work surface, then cut dough in half. Remove a baseball-sized chunk of dough from each half, then reshape the larger halves into balls and place on one of the baking sheets. Shape the smaller dough balls into logs and cut into four equal-sized pieces each (8 total). Roll two pieces into balls and place on the second baking sheet.
- With the remaining six pieces of dough, roll them into a ball, then roll them out into 6 inch logs, making them thinner in the middle and wider at the ends to resemble bones. Place them on the baking sheet.
- Brush all 10 pieces of dough with 2 tablespoons melted butter and loosely cover with plastic wrap. Let rise in a warm, draft-free area until almost doubled in size, around 1½ hours.
- Preheat oven to 325 degrees. Remove plastic wrap, then carefully lift a bone from the ends and place over the large dough ball at a 12-6 o'clock heading. Place a second bone at 10-4 o'clock, and the third at 8-2 o'clock. Place a smaller dough ball on top (at the intersection of all three bones) and press down gently into the bones and main ball.
- Bake until browned and bread sounds hollow when tapped. Working in batches, brush ¼ of a loaf with melted butter and sprinkle with remaining crushed Cinnamon Toast Crunch, working quickly so it sticks to the loaf. Repeat until both loaves are covered, then allow to sit on wire racks for 1 hour to cool before slicing. Enjoy with hot chocolate.
Share your photo and tag @asimplepantry or #asimplepantry!

Leave a Review