Last year, before Delaney was born, Grandma took me to Mrs. Thomas’ Teahouse in Mesa for a lovely tea-filled luncheon. I drank delightfully fruity tea and ate scrumptious little tea sandwiches and finished it all off with a wonderful scone that I dipped in lemon curd.
For my birthday this year we repeated our little trip, and although the giant SRP fire caused all the power to be cut to over 8,000 people in the area (including where we were dining!), I still thoroughly enjoyed my teahouse experience.
Remembering how delicious the scone was, and hearing quite frequently from my friend, Chronic, who adores scones, I decided that it was definitely time to make a batch for myself.
So today I share with you my raspberry preserve-filled coffeehouse scone recipe!
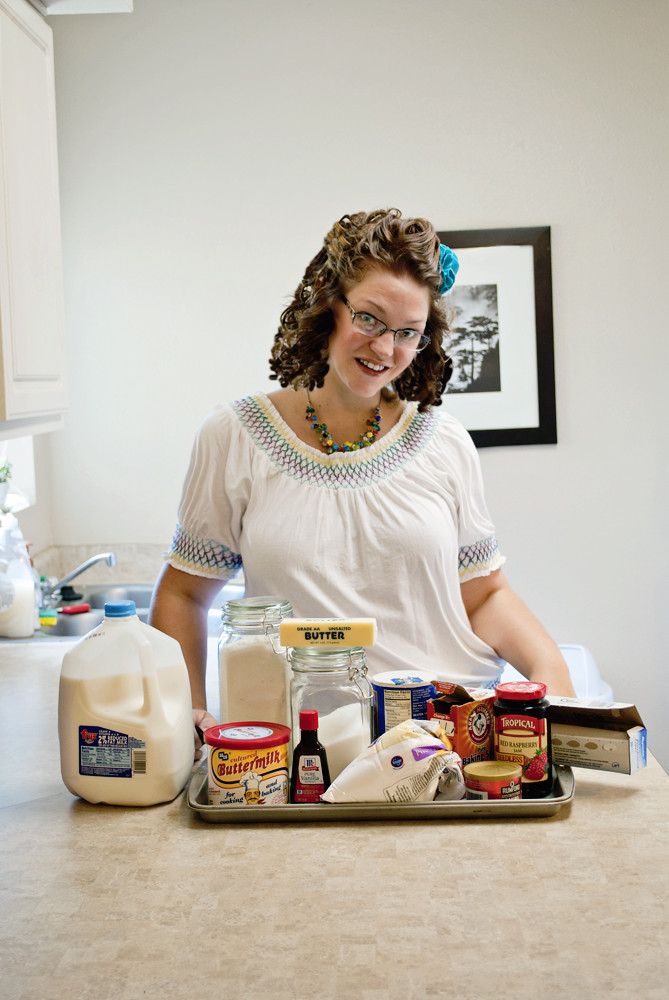
2C Flour
¼C Granulated Sugar
1tsp Baking Powder
½tsp Baking Soda
¼tsp Salt
½C Unsalted Butter, cold and cut into pieces
⅔-3/4C Buttermilk
1tsp Vanilla Extract
⅓C Raspberry Preserves
Milk
Powdered Sugar
Preheat oven to 400 degrees and place rack in middle of oven. Line a baking sheet with parchment paper.
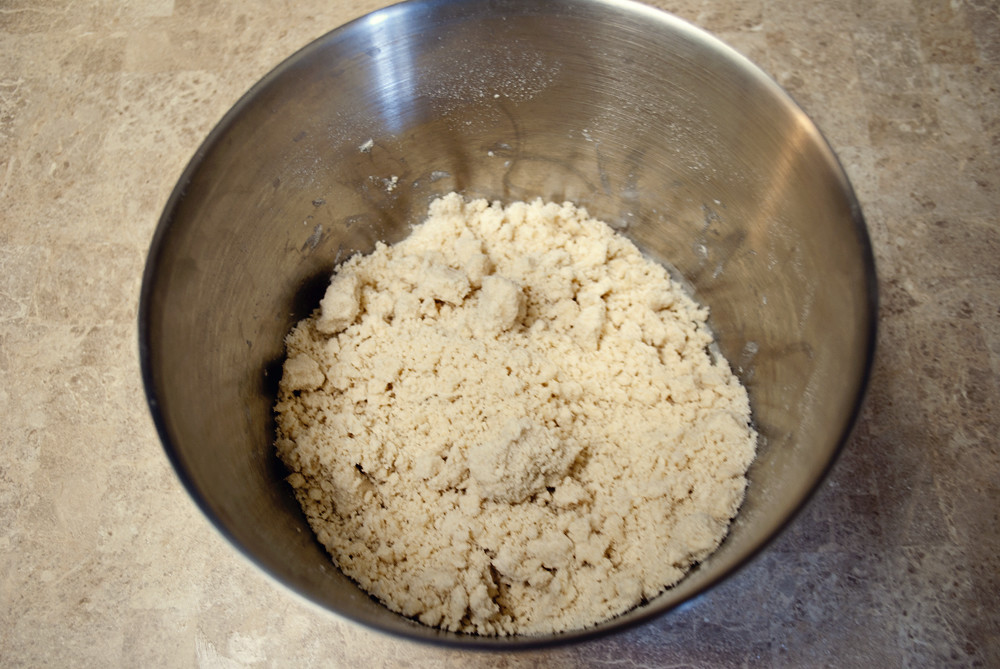
In a large bowl, whisk together the flour, sugar, baking powder, baking soda and salt. Cut the butter into small pieces and blend into the flour mixture with a pastry blender or two knives (I actually ended up using my hands). The mixture should look like coarse crumbs. Add the buttermilk (you should use more than ⅔C, but less than ¾C…weird, I know) and vanilla extract and stir until the dough comes together. Do not over mix.
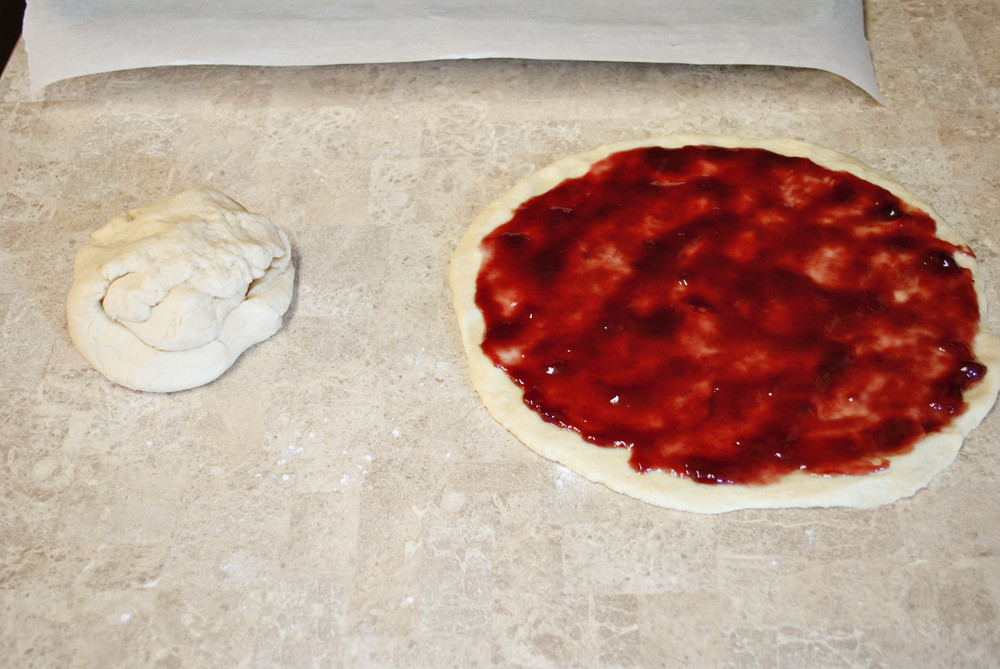
Transfer the dough to a floured surface and knead gently until the dough forms a non-sticky ball. Divide the ball into two equal parts and form into rounds that are between ½in and 1in thick. Take the preserves and spread evenly over the top of one of the dough rounds, then place the second round on top. Pinch together the sides of the rounds to seal the preserves inside, then cut into eight slices like you would a pizza.
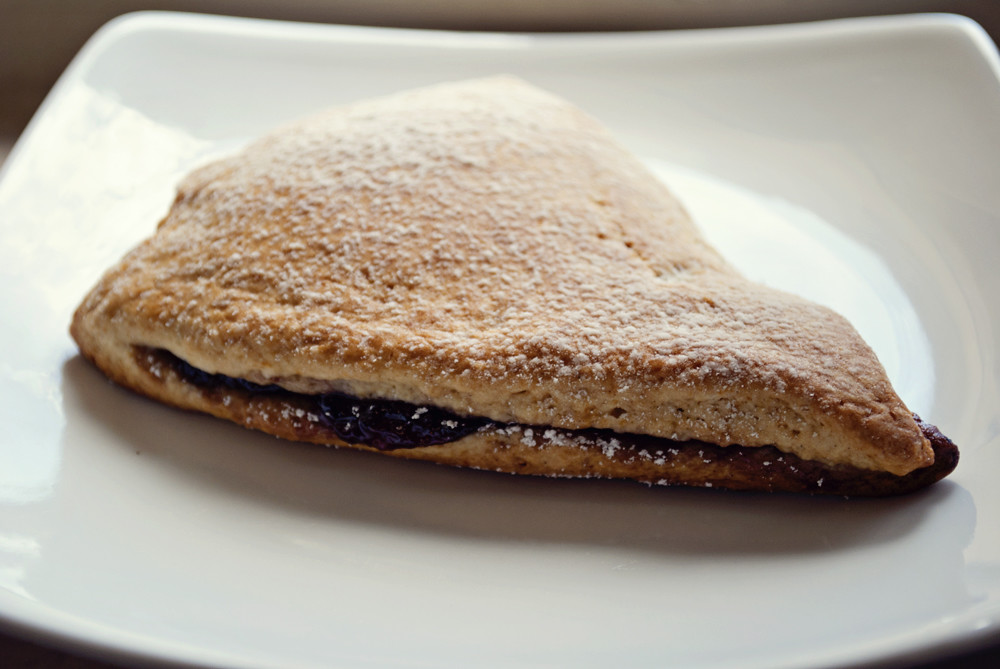
Transfer the pieces onto the baking sheet, brush the tops with milk (which helps to brown the tops), and place in the oven for 15mins, or until the tops are golden brown and the dough passes a toothpick test.

Remove the scones from the oven then increase the heat to broil. Sift a generous layer of powdered sugar over the scones, then place back into the oven for about 30 seconds, turning the pan as necessary to properly brown the sugar without burning it. The sugar will burn very quickly, so do not turn away!
Remove scones from oven and enjoy!
If you would like a “neater” looking scone, I suggest cutting the rounds into eight slices BEFORE adding the preserves, then spread individually and pinch each one closed completely to help prevent leaking and sliding. Also, you can use any preserve or jam you’d like. I also plan on adding a little cinnamon to my recipe for the next batch.

Kelly says
Yum! Those look delicious!